
Retaining Wall Types and Installation Guide for 2024
Home improvement trends are always changing, and retaining walls are now more popular than ever. In fact, demand has skyrocketed by 95% in just ten years. These walls not only make your home look better but also help with landscaping problems like uneven land and soil erosion.
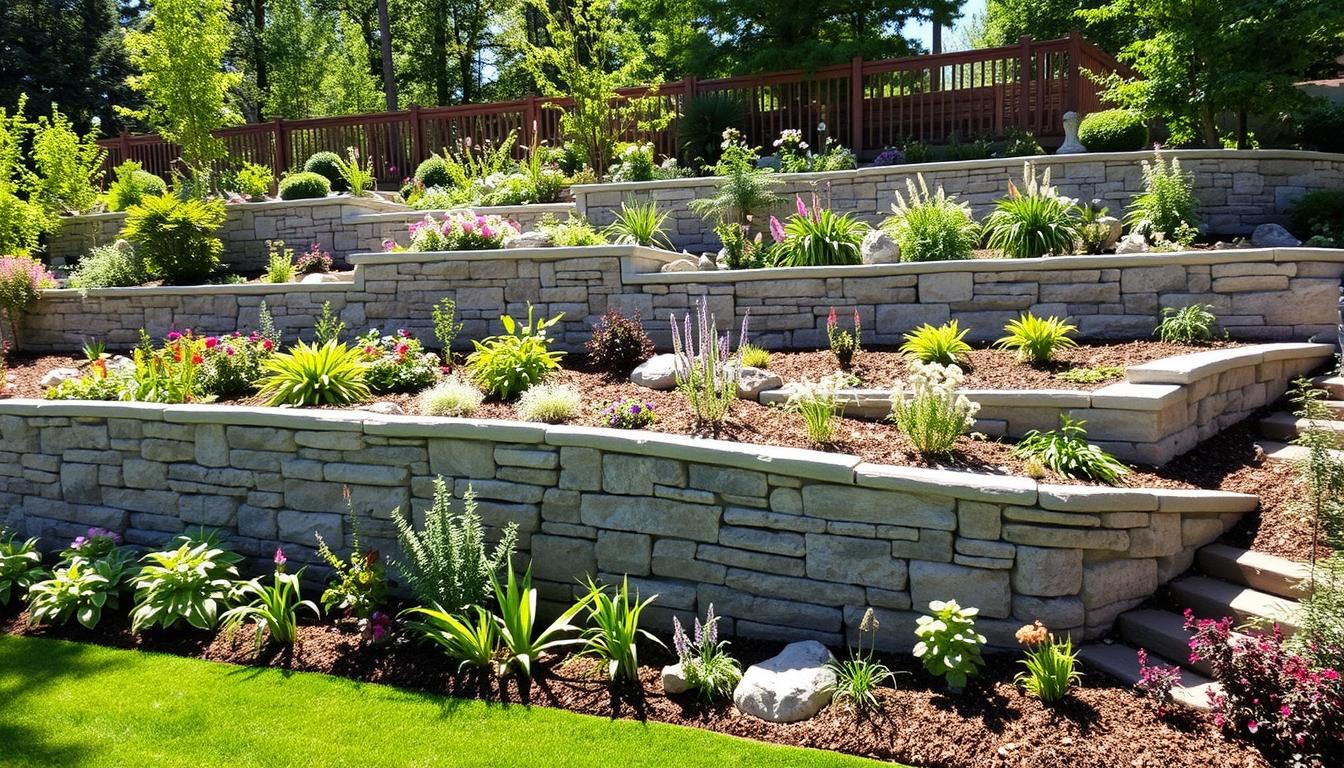
A variety of retaining wall types in a lush garden setting, showcasing materials like stone, timber, and concrete; different heights and styles blending harmoniously with vibrant greenery, flowers, and natural landscapes; sunlight casting shadows on the walls; a serene and balanced environment. Evergreen Oasis, LLC.
Key Takeaways
- Retaining walls are a practical and visually appealing solution for managing sloped landscapes and preventing soil erosion.
- Homeowners can choose from a variety of retaining wall materials, including concrete, natural stone, and interlocking blocks, to suit their design preferences and budget.
- Proper site preparation, including trench excavation and drainage installation, is essential for the long-term stability and effectiveness of a retaining wall.
- Consulting with a professional engineer is recommended for retaining walls taller than 4 feet to ensure structural integrity and safety.
- Partnering with a reputable masonry manufacturer can provide access to high-quality, durable retaining wall products that contribute to the longevity of the installation.
Understanding Retaining Wall Basics and Functions
Retaining walls are key structures that hold back soil. They make landscapes with different levels even. These walls stop erosion, manage water, and turn steep slopes into outdoor spaces.
They help in terracing hills, supporting driveways, and creating raised garden beds. Retaining walls are vital in landscape design and building.
What is a Retaining Wall?
A retaining wall keeps the ground level between two areas. It's built from materials like concrete, stone, or blocks. These walls handle the pressure from the soil they hold back.
Primary Functions and Benefits
- Prevent soil erosion and landslides on sloped or hilly terrain
- Create usable outdoor spaces by transforming steep areas into level ground
- Manage water runoff and drainage, diverting excess rainfall to designated areas
- Enhance the aesthetic appeal of a landscape through various design options
- Increase property value by expanding the functional and livable areas of a property
Common Applications in Landscaping
Retaining walls are used in many landscaping ways, including:
- Terracing steep slopes to create level garden beds, patios, or walkways
- Supporting the edges of driveways, pathways, and other hardscaping elements
- Defining and separating different landscaping zones, such as gardens and lawns
- Controlling erosion and water runoff on hillsides or along the edges of water bodies
- Enhancing the visual appeal of a property through decorative wall designs and materials
| Retaining Wall Type | Typical Retained Height | Key Advantages |
|---|---|---|
| Gravity Retaining Walls | Up to 3 meters | Easy to build, cost-effective, suitable for small-scale projects |
| Reinforced Soil Walls | Up to 10 meters | Reduced construction costs, faster installation, lower bearing pressures |
| Cantilever Retaining Walls | Up to 5 meters | Compact design, suitable for limited space, cost-effective |
| Embedded Retaining Walls | Up to 40 meters | Suitable for deep excavations, can form underground structures |
Popular Retaining Wall Materials and Styles
Homeowners and landscapers have many materials to choose from for retaining walls. Options include stackable concrete blocks, natural stone, timber, and modular block systems. Each material has its own look and function.
Concrete blocks are popular for their durability and easy setup. The Allan Block Collection, Fieldstone Collection, and Aztec Collection mimic stone or masonry. They fit well with many landscape styles.
Stone retaining walls made from fieldstone or limestone offer a natural look. They are strong and can last 20 years or more with proper installation.
| Material | Durability | Cost (per sq. ft.) | Maintenance |
|---|---|---|---|
| Concrete Blocks | Highly Durable | $11.40 | Low |
| Natural Stone | Highly Durable | $25 | Moderate |
| Timber | Moderate Durability | $45 per post | High |
Timber retaining walls add a rustic touch but are less durable. They can last up to 40 years. Regular checks and wood treatment are key to their long life.
The right retaining wall material depends on several factors. These include style, budget, DIY skills, climate, upkeep, wall size, and soil pressure. Choosing wisely ensures a wall that meets your landscape and needs.
Essential Planning and Site Preparation
Proper planning is key for a successful retaining wall installation. Before starting, assess the site, measure the area, and figure out the materials and tools needed. This thorough planning ensures your retaining wall install is smooth and follows local building codes.
Site Assessment and Measurement
First, check the soil and slope of the site. Measure the wall's length and height to know how many modular blocks wall units you'll need. For walls under 18 inches, use pavestones that are 3.5" x 10.5" x 7". Walls up to 3 feet high can use 6" x 16" x 10.5" concrete blocks, perfect for DIY projects.
Required Tools and Materials
- Shovels, levels, stakes, and string for site preparation
- Tampers for compacting the base
- Retaining wall blocks, gravel, drainage pipes, and adhesive
Local Building Codes and Permits
Always check with local authorities about building codes and permits, especially for walls over 3-4 feet. Also, contact utility services to avoid damaging underground lines before excavation.
With careful planning and site preparation, you'll create a strong, lasting retaining wall install. It will enhance your outdoor living space's beauty and function.
Foundation and Base Layer Construction
Building a strong foundation is key in making retaining walls last. A good base is vital for the walls' stability and strength. Let's look at the steps to create a solid foundation and base layer.
Start by digging a trench that's 12 inches deep and 24 inches wide. This will be the base of your retaining wall. Use a hand tamper or vibrating plate compactor to pack down the soil at the bottom. Then, put landscape fabric in the trench to stop soil erosion and keep the base strong.
Fill the trench with 6 inches of 1.5-inch processed gravel or 3/4-inch crusher run. It's important to compact this material in layers of 2-3 inches. This makes sure the foundation is level and solid. It will support your wall construction and segmental retaining walls.
To add more stability and help with drainage, think about using a BaseCore™ Geocell system. It's a cost-effective and strong option that boosts the base's load-bearing ability and improves drainage. The size and budget of your project will help decide the best base material.
Getting the foundation and base right is crucial for your retaining wall's success. By following these steps, you'll have a strong foundation that will support your retaining wall construction and segmental retaining walls for many years.
A detailed construction scene of a retaining wall, featuring various types of materials like concrete blocks, stone, and timber being arranged, with construction workers using tools and machinery, surrounded by a well-prepared foundation and base layer, lush greenery in the background, emphasizing precision in engineering, vibrant colors - Evergreen Oasis, LLC.

| Retaining Wall Foundation and Base Requirements | Recommended Specifications |
|---|---|
| Trench Depth | 12 inches |
| Trench Width | 24 inches |
| Base Material | 6 inches of 1.5-inch processed gravel or 3/4-inch crusher run |
| Compaction | Compact base material in 2–3-inch layers |
| Drainage Solution | BaseCore™ Geocell or gravel/river rock in landscape fabric |
Retaining Wall Installation Steps
Building a strong retaining wall needs careful attention. Start by digging a trench for the foundation. Make sure it's level and packed well. This first step is key for a good retaining wall install.
Trench Excavation Guidelines
The trench should be about 6 inches deeper than the wall's base. Make it 6 to 12 inches wider than the modular block wall you're building. This extra space helps with compaction and drainage.
First Course Installation
Place the first row of blocks on the base, making sure they're level. Use a rubber mallet for adjustments. Fill the blocks' hollows with gravel for extra strength.
Proper Block Placement Techniques
- Stagger the next rows, using lips and grooves for a strong structure.
- Always check the wall's level and alignment as you build.
- Begin at the lowest point or feature for walls with slopes or corners.
By following these steps, you'll get a sturdy and attractive retaining wall install. It will last for years.
Drainage System Requirements and Installation
Drainage is key in building any retaining wall. Without it, water can build up and cause the wall to lean or fail. Experts say to put a perforated drainage pipe behind the first course, covered to stop clogs.
The pipe should be at least 12 inches behind the wall. It should lead to a spot where water can safely flow away. Also, add 3/4-inch crushed stone behind each course to help with drainage and prevent water pressure.
It's also important to make sure the area behind the wall drains well. Use weep holes, spaced 3-4 feet apart for big walls and 8 feet for small ones. These holes should be 1-1/2 to 4 inches in diameter to let water out.
In places with lots of rain or high-water tables, you might need a French drain or dry well. These helps move water away from the wall and prevent damage. Good drainage is essential for a retaining wall's long-term stability and performance.
"A detailed illustration of a retaining wall drainage system, showcasing various layers including gravel backfill, permeable membranes, and weep holes, with lush greenery in the background. Emphasis on water flow and drainage efficiency, depicting a cross-section view. Style inspired by technical architectural drawings. Evergreen Oasis, LLC."
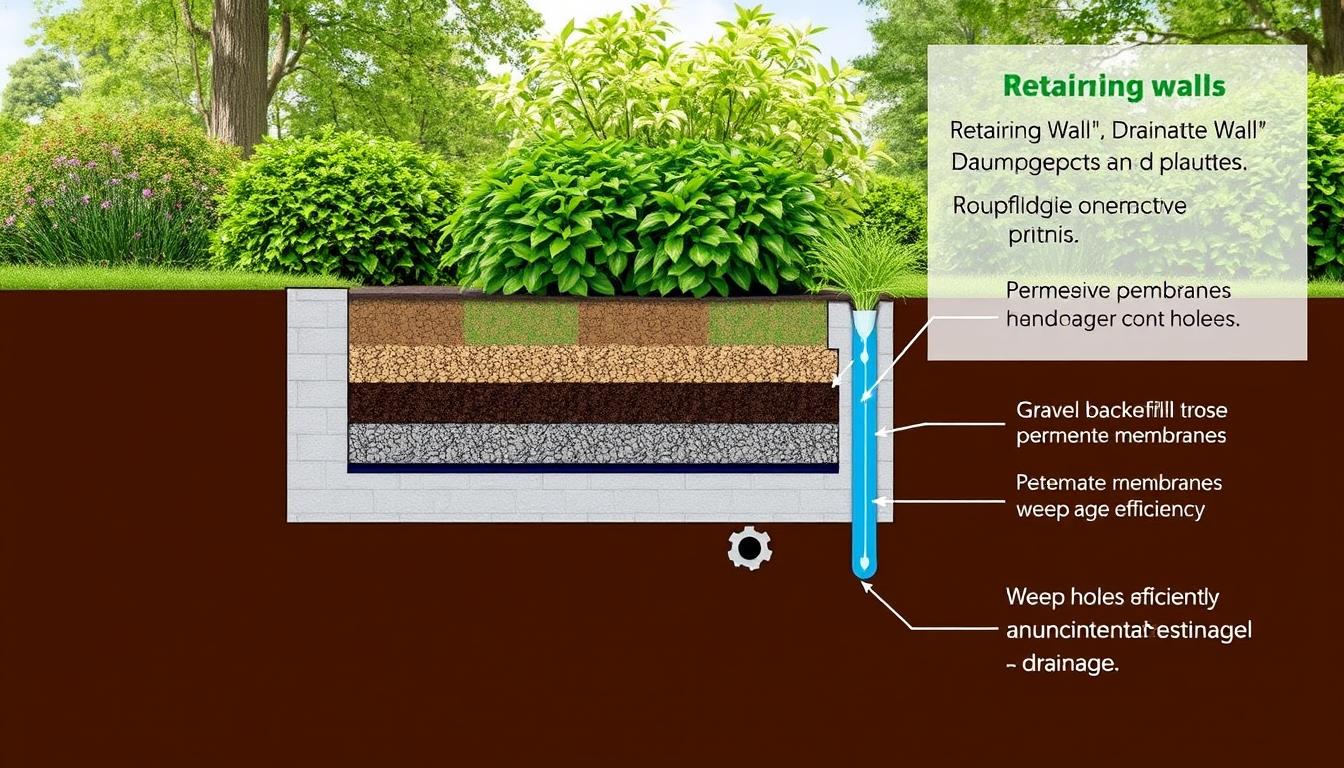
"Proper drainage is the foundation of a strong and durable retaining wall. Neglecting this crucial element can lead to costly repairs down the line."
The main parts of a good drainage system for a retaining wall are:
- Perforated drainage pipe behind the first course, covered with a sleeve
- 3/4-inch crushed stone layer behind each course for improved drainage
- Weep holes at regular intervals along the wall for water exit
- French drain or dry well system for high groundwater areas
- Proper slope away from the wall to encourage water runoff
By following these best practices for design and construction, you can make sure your retaining wall lasts. This protects your property and investment.
Structural Considerations for Walls Over 4 Feet
Walls over 4 feet tall need extra care and often require a pro's touch. These walls face more stress, needing strong reinforcement and careful planning. This ensures they stay stable and safe for a long time.
Engineering Requirements
For walls over 4 feet, most places need a building permit and a design from a licensed engineer. Concrete blocks alone might not hold back heavy soil. So, soil type, slope, and extra loads like driveways must be thought through to avoid failure.
Reinforcement Methods
- Geogrid installation: Geogrids are strong, polymer-based materials that boost the wall's stability and strength.
- Anchoring systems: Anchored walls use cables or rods to push forces into the soil, making them more stable.
- Concrete reinforcement: Adding steel to the concrete makes the wall stronger and less likely to crack or fail.
Companies like Mutual Materials give detailed specs and design help for their retaining walls. This makes meeting engineering needs for tall walls easier.
Professional Consultation Guidelines
For walls over 4 feet, getting advice from a soils engineer and a skilled contractor is wise. They can check the site, look at the soil, and create a custom design. This ensures the wall is strong and works well over time.
"Proper engineering and construction techniques are crucial for taller retaining walls to withstand the immense lateral forces and prevent potential catastrophic failures."
Knowing about engineering needs, reinforcement options, and the value of expert advice helps. This way, homeowners and builders can make sure tall retaining walls are safe and work well.
Backfilling and Compaction Techniques
Proper backfilling and compaction are key for a retaining wall construction or modular block wall to last long. By using the right methods, you can avoid settling, structural problems, and drainage issues.
The backfilling process adds soil in layers, from 4 to 12 inches, based on the project. Compaction is vital, using methods like static, impact, and vibrating. Proofrolling with heavy equipment checks the soil's readiness and looks for any issues.
Choosing the right backfill material is also crucial. Soil or stone that drains well and supports the foundation is best. Keeping an eye on soil moisture and achieving the right compaction prevents future problems.
- Make sure to install drainage solutions like French drains to keep water away and protect the foundation.
- Do regular compaction tests and inspections to meet industry standards and project specs.
- Plan the backfilling carefully to allow the foundation to settle and concrete to cure.
By following these best practices for retaining wall construction and modular block wall backfilling, you can build a stable and lasting structure.
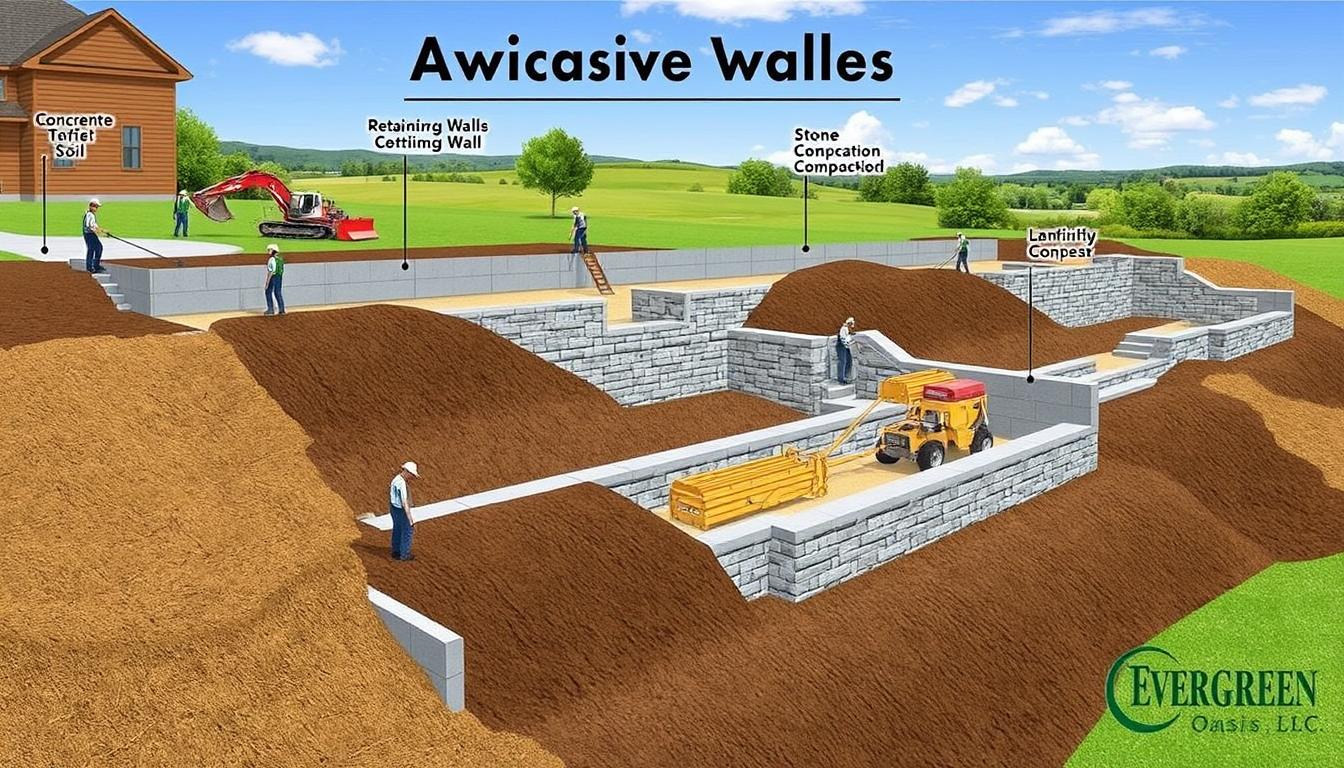
"Evergreen Oasis, LLC - a detailed illustration of a retaining wall construction site, featuring various types of retaining walls such as concrete, stone, and timber. Showcase workers actively backfilling and compacting soil, with construction equipment like excavators and compactors in action. Include a landscape background with greenery and a clear blue sky, emphasizing the structural integrity and aesthetic of the project."
Finishing Touches and Wall Caps
Adding the right cap blocks to your retaining wall can make it look professional. You can choose from classic stone, versatile concrete, or timeless brick. The right wall caps can really make your retaining wall design stand out. Let's look at the different segmental retaining walls cap installation methods and how to apply adhesive for a perfect finish.
Cap Installation Methods
When installing caps, pay close attention to detail. First, make sure the top course of blocks is clean and free of debris. This ensures a smooth surface for the caps to stick to. Then, apply a lot of concrete adhesives with a caulking gun, and press the caps firmly into place.
For extra stability, you can use concrete screws or spikes to hold the caps in place. This is especially important for tall retaining wall design or areas with strong winds or earthquakes.
Adhesive Application Tips
- Choose a high-quality concrete adhesive made for outdoor use and retaining walls.
- Spread the adhesive in a continuous bead along the top of the wall, without gaps.
- Press the cap blocks firmly into the adhesive for a strong bond.
- Check if the caps are level and adjust as needed with a rubber mallet before the adhesive dries.
- Wait for the adhesive to dry fully, usually overnight, before moving on.
After the caps are set and the adhesive is dry, fill the area behind the wall with the right topsoil for your landscaping. This will help keep the caps in place and blend with the surrounding area.
Quality materials and attention to detail are key for a lasting and attractive segmental retaining walls finish. By following these steps, you can make a retaining wall that looks great and works well in your outdoor space.
Conclusion
Building a retaining wall is a tough but rewarding task. It makes your landscape look better and work better. The right retaining wall design and retaining wall construction are key for lasting stability and performance.
For walls over 4 feet tall or in tricky spots, get expert advice. This ensures the wall is safe and lasts long.
When picking materials for your retaining wall, go for top-notch products. This means choosing from trusted makers. A well-made retaining wall can last for years, adding beauty to your property.
With careful planning and skilled work, your retaining wall will be a gem. It will make your outdoor area more useful and boost your home's value.
Follow the tips in this article and team up with seasoned pros. You'll make a retaining wall that's both useful and beautiful. It's a great way to improve your landscape.
FAQ
What is a retaining wall?
A retaining wall holds back soil and makes areas level. It stops erosion, makes outdoor spaces, and controls water runoff.
What are the common applications of retaining walls in landscaping?
They're used for terracing slopes, creating garden beds, and supporting driveways or patios.
What are the popular materials used for retaining walls?
You can use concrete blocks, natural stone, timber, or modular blocks. Each has its own look and function.
What are the essential steps for planning and preparing the site for a retaining wall?
First, measure the area and check the soil. Then, decide on the wall's height. You'll need tools like shovels and levels. Also, gather blocks, gravel, and pipes.
How do you construct the foundation and base layer for a retaining wall?
Start by digging a trench 12 inches deep and 24 inches wide. Then, compact the soil and line it with fabric. Fill it with gravel, compacting in layers.
What are the key steps for installing a retaining wall?
Lay the first course of blocks on the base. Make sure they're level. Fill the blocks with gravel for stability. Then, stack the blocks, staggering them for strength.
Why is proper drainage important for a retaining wall?
Good drainage stops water buildup and wall failure. Use a drainage pipe and crushed stone behind each course.
What are the special considerations for retaining walls over 4 feet high?
Walls over 4 feet need extra care and engineering. They might need geogrid for support. Always check with a soils engineer and contractor.
How do you properly backfill and compact the area behind a retaining wall?
Backfilling is key for stability. Use gravel for drainage, then fill with the right material. Compact in layers to prevent settling.
What are the key steps for finishing a retaining wall with cap blocks?
Finish with cap blocks for a neat look. Apply adhesive, place the blocks, and check for level. Let it set overnight.